Quick Start
Get your first site up and running with GitCMS in under five minutes.
This guide walks you through connecting a repository, setting up .gitcms, and previewing your site in GitCMS.
Here is the flow as a one-minute speed-run before the step-by-step version:
Prerequisites
- A GitHub account if you are connecting or installing repositories.
- A Google or GitHub account if you are joining an existing workspace as an invited editor.
- At least one repository containing Markdown or MDX content (e.g. a blog, docs site, or any static site).
- Your repository should use a supported static site generator (Astro, TanStack Start, Next.js, Hugo, Jekyll, Gatsby, Eleventy, or any framework that reads Markdown files). See the full list in Framework Setup.
Step 1: Sign in
Sign in with Google or GitHub. GitCMS automatically creates a personal workspace for you — you'll land on the dashboard ready to connect your first repository or accept an invite.
Use GitHub when you are setting up repositories or installing the GitCMS GitHub App. Use Google when you are joining as an invited editor and do not need to own or install repositories.
If you use Google and GitHub with the same email address, GitCMS can link both sign-in methods to the same account.
Need a team workspace? If you're setting this up for a startup team, client project, or agency workflow, click the workspace switcher in the sidebar and choose Create workspace. A workspace groups your repositories, sites, team members, and billing under one roof. You can always create more workspaces later.
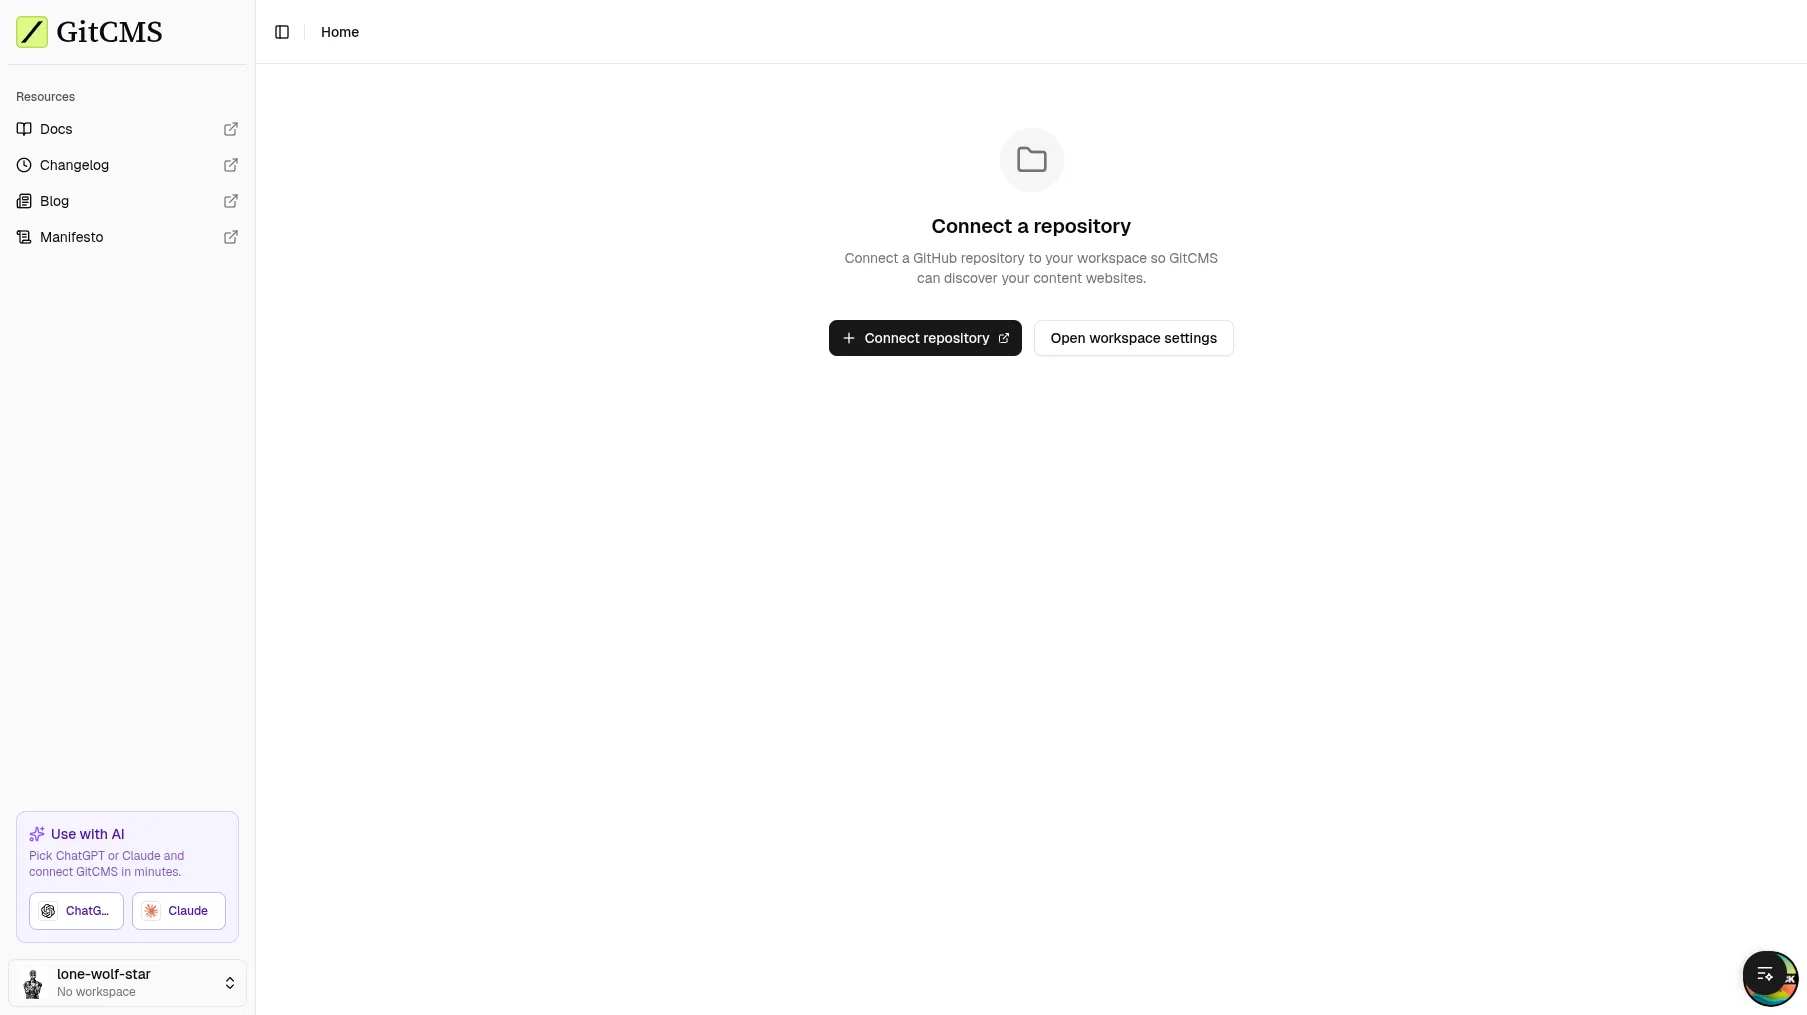
Step 2: Connect a repository
Once your workspace is created, click Connect repository. This redirects you to GitHub to install the GitCMS GitHub App on the repositories you want to manage.
Select the repositories that contain your content. GitCMS only needs read/write access to repository contents — it never touches your CI/CD, secrets, or other settings.
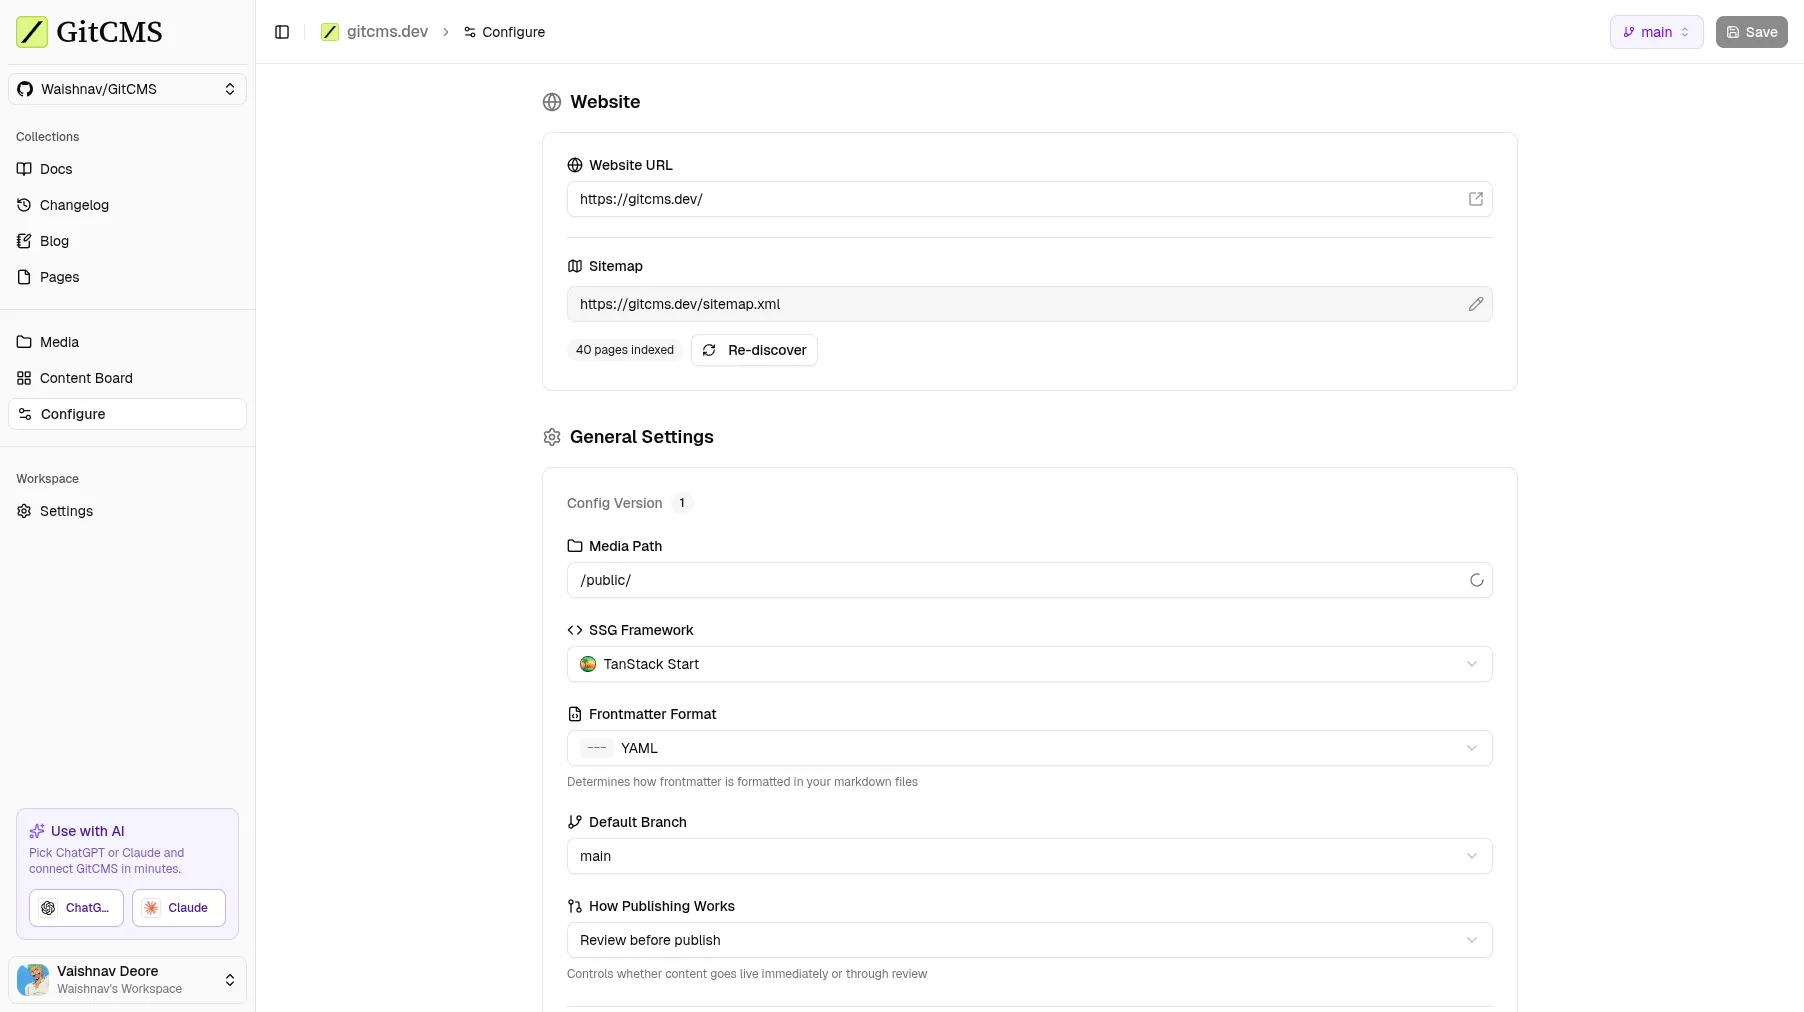
Step 3: Configure your site
After connecting a repository, open it from the dashboard. GitCMS will take you to the Settings page where you can configure your site:
- Website URL — Your deployed site's URL.
- Framework — GitCMS auto-detects your static site generator and suggests appropriate defaults.
- Media path — Where uploaded images are stored in the repo (e.g.
public/images). - Collections — Define your content types, their directory paths, and frontmatter schemas.
GitCMS saves configuration into a repo-level .gitcms/ folder. The manifest lives in .gitcms/sites.jsonc, and each detected site gets its own config file at .gitcms/sites/<site_key>/config.jsonc. These files are auto-generated — you don't need to write or edit them by hand. See Configuration for more details.
If you prefer bootstrapping config from the terminal (especially for monorepos), use the onboarding CLI. See CLI Onboarding.
Step 4: Open your site in preview mode
Go back to the GitCMS dashboard. Your site should now appear in the Your websites list. Click it to open the CMS.
You'll see your collections listed in the sidebar. You can browse your content, open the editor, inspect settings, and explore how GitCMS works on your site.
If your site is not licensed yet, GitCMS opens in preview mode. Preview mode lets you explore the website in GitCMS before buying a license.
Step 5: Buy a license to save and publish
When you're ready to use GitCMS for real changes, open Billing and buy a site license for the website you want to manage.
If you run a personal site or OSS docs, contact waishnav@gitcms.dev about complimentary access.
Step 6: Make your first edit
Open any existing content file. The visual editor loads your Markdown/MDX content in a Notion-like interface:
- Use slash commands (
/) to insert headings, lists, images, code blocks, and more. - Edit frontmatter fields in the structured form above the editor.
- By default, edits go through Review before publish: tasks on the content board move from draft through review before anything goes live.
Every change is still stored in your repository. Depending on publishing mode, GitCMS either keeps work inside the editorial workflow or saves directly to your site’s default branch (live content).
Step 7: Invite teammates or collaborators
When you're ready to collaborate, open Workspace Settings → Members and invite the people who need access.
Invited teammates can sign in with Google or GitHub. Google works well for non-technical editors, marketers, clients, and reviewers who only need access to GitCMS. GitHub is still required for people who need to install or manage repository connections.
GitCMS keeps access intentionally simple:
- choose a role such as Editor, Reviewer, or Viewer
- choose whether they can access all sites or only selected sites
- optionally allow them to publish
This works well for:
- solo founders working with AI-generated drafts
- startup teams with writers and approvers
- developers managing client content
- agencies inviting clients to review only their own sites
See Roles & Site Access for the full model.
What's next?
- Configuration — Learn about all available settings and how they're managed.
- CLI Onboarding — Generate
.gitcmsconfig for single-site or monorepo setups. - Collections & Fields — Understand content schemas with field types and validation.
- Localization (i18n) — Configure locale-aware content paths.
- Roles & Site Access — Learn how workspace roles, selected-site access, and publish rights work.